
I've been wanting to do a post detailing how I apply estradiol patches for some time, and the opportunity presented itself today. When I first started on patches I screwed a lot of this up, so I'm hoping the pictures and descriptions here can save somebody the effort.
Mild NSFW warning: I'm showing some skin and you can see my out-of-focus panties in a couple of photos. Don't get too excited.
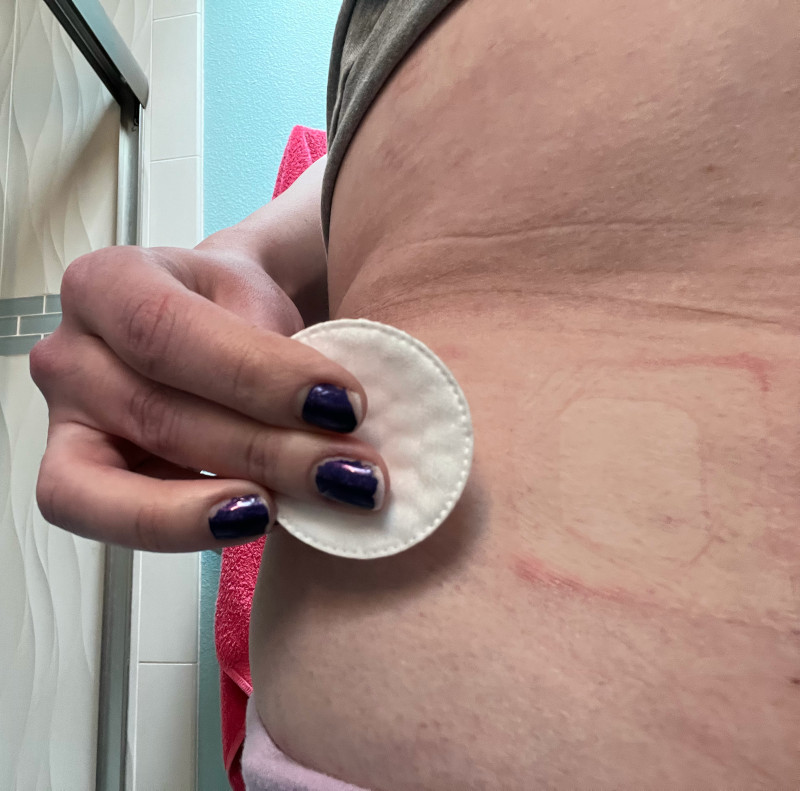
3/24/24 Edit: Skip the alcohol step! It can make contact dermatitis worse! Just make sure your skin is clean with soap and water. I have made edits to this guide leaving but striking through the relatesd steps and supplies.
Step 1
First, wash your hands and gather your supplies:
Cotton roundsRubbing alcohol- A pair of scissors
- A water-resistant marker (I use an ultrafine felt tipped Sharpie)
- A roll of Tegaderm (this roll is 3 inches wide)
- An 0.1mg estradiol patch
5/22/23 Edit: Make sure it's real Tegaderm, not some knock off! I had issues with peeling and patch failure (rashes) that were largely solved when I switched to the real thing. It's worth it!

Step 2
Remove your oldest patch, and wipe down the area with rubbing alcohol and a cotton round. Also wipe down the new patch site and let it dry. clean the old and new sites with soap and water. Usually it's a good idea to apply the new patch in a different place so that your skin can recover from the last patch.
When it comes to choosing a place for your patch, the closer you can get it to the center of your body and the thinner the skin underneath it, the better. I put my patches on my lower abdomen and upper buttocks, but I've also heard of people using their upper arms as patch sites too.
Step 3
Get your new patch out of its packaging and locate which side has the two plastic sheets protecting the sticky side of the patch. Peel off the smaller of the two sheets so that a small amount of the sticky side of the patch is exposed.

Step 4
Carefully stick the patch to your chosen patch site and roll the rest of the patch off of its plastic sheet and onto your body by kind of making a "U" with the patch. This ensures you don't have to touch the patch as you apply it, which would compromise its hold and make things dirty underneath.

Step 5
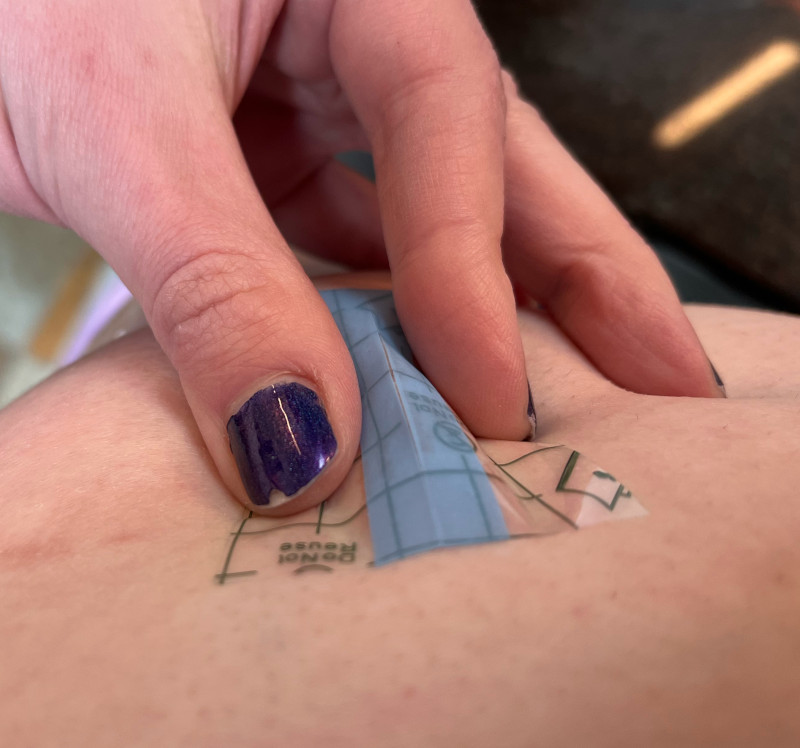
With your scissors, cut a length of Tegaderm. Tegaderm is a breathable plastic sheeting used for wound care and protecting new tattoos. Estradiol patches don't stick amazingly well, so the Tegaderm is used to hold them on better and protect skin on the patch edges from irritation.

Step 6
Throw a scrunchie around the Tegaderm roll before you put it away. This stuff does not want to stay wound and has exploded like a watch spring in my bathroom drawer before.

Step 7
Like the estradiol patch, there's a small strip and big strip of wax paper on the back of the Tegaderm. Peel the small strip off.

Step 8
Again like the estradiol patch, first stick the exposed end of the Tegaderm to your body, and roll on the rest of the sheet by folding it and carefully unpeeling the remaining wax paper. This should form a smooth layer on top of the patch with no wrinkles or air pockets. Be sure to leave an even margin around the patch so that if any of the Tegaderm does get peeled or rolled up, the patch should remain mostly unaffected.

Step 9
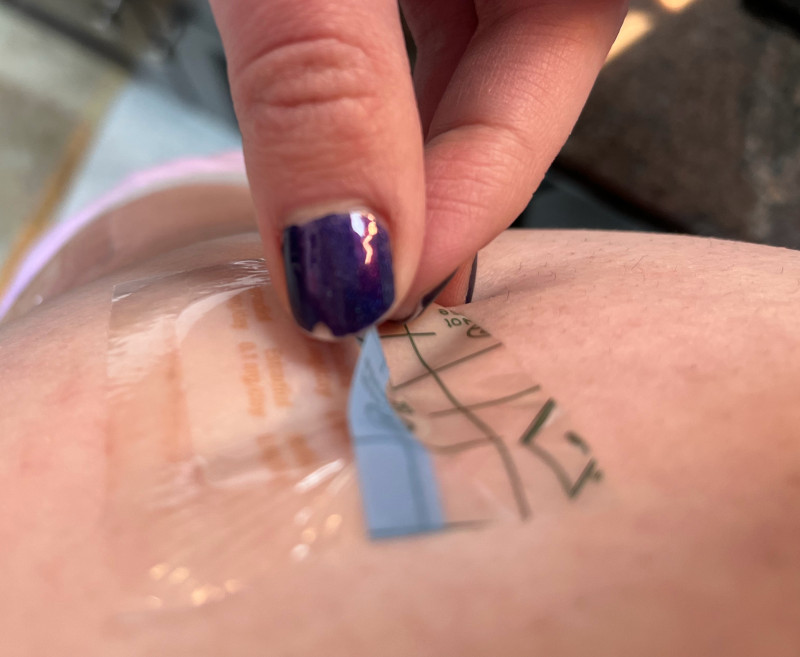
The Tegaderm has an upper layer of plastic sheeting on top with a seam in the middle. Once you're confident that the sheet has been applied well, pinch the patch and sheet so that the seam tents. Then you can peel back the two pieces of the upper layer, fully exposing the the Tegaderm.
Step 10
Using the marker, write the date of application on your patch. I believe this is reasonably safe, these nurses in an old forum thread seem to think so and the Sharpie MSDS backs them up. I've found keeping track this way to be wholly invaluable for staggering patches, especially.

Step 11
You're done! Go forth and live life as a more estrogenated being!
